VIDEO: Handmade Halloween: Day 5 ~ Got Candy? Interactive Card featuring Essentials by Ellen

Happy almost Halloween and welcome to the final day of my Handmade Halloween video series for 2015!  It has been a super exciting week in my crafty world because I relocated my craft room from the dark bedroom in the corner to the bright and spacious room where I can sit in front of the window while I create!  I'm super jazzed and couldn't wait to film my first video in my new space!  However, it also means I'm a little behind because I got all distracted and stuff ;)


Anyway, for today's project I wanted to go for a bit of a cleaner card and I really wanted to try to make an interactive pop-up card using the adorable little ghost in the Got Candy? stamp set from Essentials by Ellen line sold at Ellen Hutson, LLC.  This set was designed by Julie Ebersole and I gotta tell you guys, it's basically too cute for words.  This was my first Essentials by Ellen stamp set and I am super impressed with the quality and the customer service that I received when I placed my order at Ellen Hutson, LLC.  I will be ordering more, hopefully, soon!


So I did some simple masking and Copic coloring for my little pumpkins and then some partial fussy cutting to create the front panel.  The little ghost is on a paper strip that allows him to pop up and say "Boo!" and the strip has some strategically placed foam tape on and around it to ensure he doesn't go too far up or too far down.  Now, this was my first time ever trying to do a card with this interactive element so my way is probably not the most efficient AND I made some oopsies mistakes that I can learn from for my next attempt - such as have a bigger pull tab so you don't rip it!


Overall, I think this turned out pretty darn well for a first try and you can check out the full tutorial (oopsies included) by clicking on the video link below.  Thanks so much for stopping by!  I'm going to be starting up my Handmade Holiday series in the next few days and I'm super excited to get my Christmas craft on!  Have a great evening!  Bye!


~~~~~~~~~~~~~~~~~~~~~~~~~~~~~~~~~~~~~~~~~~~~~~~~~~~~~~~~~~~
SUPPLIES
*Amazon affiliate links used when possible

VIDEO: Handmade Halloween: Day 4 ~ Witchy Watercolor with Hero Arts

Happy Monday-before-Halloween!  I really have to get my booty in gear so that I can get all five days of my Handmade Halloween series up before the 31st!  For Day 4 I'm showing a more traditional Halloween card with some blacks and grays and a bit of watercolor using Distress markers.  


I used the Witch Feet Stamp & Cut set by Hero Arts.  These stamp sets are a great value since the coordinating die comes with it!  I used all three of the fab witch feet for my watercolor piece and stamped them in some VersaFine Oynx Black pigment ink since it stamps nice and crispy and is waterproof once it's dry.  I used my Distress markers for this simple watercoloring and then trimmed my painted panel down to fit on the front of my card.


I finished it up with some patterned paper from My Mind's Eye and some Little B washi tape.  Of course, I stuck some of the bat confetti from my Batty Border die (I'm gonna use them on every Halloween card I make!)and added some sparkle with  my Wink of Stella.


I had a ton of fun making this more traditional Halloween card.  For a full list of supplies, check out the links below.  The full video tutorial can be found on my YouTube channel and linked above.  Stay tuned for the final day of my Handmade Halloween series, coming soon!  Thanks so much for watching!  Bye!
 
~~~~~~~~~~~~~~~~~~~~~~~~~~~~~~~~~~~~~~~~~~~~~~~~~~~~~~~~~~~~~~~~
SUPPLIES
*Amazon affiliate links used when possible
SSS = Simon Says Stamp (not affiliate links)
EH = Ellen Hutson, LLC (not affiliate links)

VIDEO: Handmade Halloween: Day 3 ~ Treat Bag Toppers featuring Lawn Fawn

Happy Sunday, all!  Welcome back for another edition of my Handmade Halloween video series!  Today I have something a little different - some fun treat bag toppers featuring the Booyah stamp set from Lawn Fawn.  This set comes with three little ghostie bodies and a whopping six different costumes to dress them up in for a not-so-spooky Halloween.


I wanted to use all six costumes but I gotta be honest, I'm a little intimidated by stamp sets that come with dress-up elements because I'm never 100% sure how to mask everything off to get the spacing just right when I don't have the coordinating die cuts.  So for this project I wanted to use my MISTI tool to help with that.  I created some little ghostie "models" so that I could get the placement for my costume elements just right before picking them up with the MISTI and then stamping them on some clean cardstock.  Once that is done, I was able to use my Inkadinkado Stamping Mask Paper to create some simple masks to stamp the ghost body right over the costumes.  (Check out the video for a demo of how this is done!)


Once I had all six of my adorable not-so-spooky ghost pals all dressed up I started putting together the toppers for these little treat bags I found at my local craft store.  I used several pieces of patterned paper from the Doodlebug October 31st 6x6 paper pad and the Nesting Scalloped Circles dies by We R Memory Keepers to create the base for my toppers.  Some circles of coordinating cardstock provided the middles and some Lawn Trimmings in black and lime tied it all together!  (Full instructions in the video tutorial!)


Finally, I used some sequins from the Pretty Pink Posh Spooky Days Mix and some little bats (my Halloween fave!) to finish it all off!  I'm entering these little tags in the current Lawnscaping Challenge #116: Too Cute to Spook!  This challenge is all about not-so-spooky Halloween so go check it out!

http://lawnscaping.blogspot.com/2015/10/lawnscaping-challenge-too-cute-to-spook.html

I hope you enjoyed this project featuring the Lawn Fawn Booyah stamp set.  All of the supplies are listed and linked below, as well as the video tutorial.  I'll be back soon with Day 4 of my Handmade Halloween series.  Until then, have a fabulous weekend! Bye!


~~~~~~~~~~~~~~~~~~~~~~~~~~~~~~~~~~~~~~~~~~~~~~~~
SUPPLIES
*Amazon affiliate links used when possible

VIDEO: Handmade Halloween: Day 2 ~ Spooky Card Set Using the MISTI & Unity Stamp Co.

Happy Hump Day!  I got super ambitious for Day 2 of my Handmade Halloween video series and busted out a set of SIX cards!  Now before you start thinking I spent an entire day on this video, I'll stop you by saying that I used my new MISTI tool and it made this project a total breeze! 


For those of you that aren't familiar with it, MISTI stands for Most Incredible Stamp Tool Invented and it completely lives up to it's name!  It is a stamp positioning tool that allows you to place your stamps and then stamp over and over in the exact same location, perfect for creating multiples of the same card or making sure you get a nice crisp image on a really big, solid stamp - both of which I do in this project!


These cards feature some fabulous images from Unity Stamp Co. (they are the first company I ever bought stamps from and they have a very special place in my heart) and LOTS of distress inking!  By the end of this set I was inkier than the cards!  


These backgrounds were so much fun to create as I dug through all my vibrant colors to complete my technicolor, neon Halloween cards.  Overall, this card is a very simple layout and design and it would go pretty quickly if you only wanted to make one.  As it was, it only took me about an hour and half to create all six!  Thanks, MISTI!


I loved these cards so much I decided to enter them in a couple of challenges that are going on out there in the craft world. First, the Sparkle and Shine Challenge (because those Clear Droplets from the fabulous Pretty Pink Posh are sparkle perfection!) and also in the Simon Says Stamp Monday Challenge: Monster Mash (cuz this spooky project was a monster undertaking for me!).  Go check those out and submit your entries to play along! 


I've listed all of the supplies used below as well as linked to the full video tutorial.  Don't forget to check out Day 1 of my Handmade Halloween series and stop back by in a few days for Day 3!  I hope you all enjoyed this set of six Halloween card featuring Unity Stamp Co.  I'll catch you next time!  Bye! 


~~~~~~~~~~~~~~~~~~~~~~~~~~~~~~~~~~~~~~~~~~~~~~~~~~~~~~~~~~
SUPPLIES:
*Amazon affiliate links used when possible

VIDEO: 200 YouTube Subscribers Giveaway WINNERS!!!

Hey there!  It's time to announce some WINNERS from my 200 YouTube Subscribers Giveaway!!  FOUR WINNERS to be exact!  Let me just take a moment to express how incredibly and truly grateful I am for each and every one of you.  It makes my heart so happy to read your uplifting comments and to know that I can help inspire you all to get your craft on!


Now, when I started this giveaway a mere two weeks ago I was celebrating 200 subscribers over at my YouTube channel and by the end of the giveaway I have more than 350 subscribers SO that means I went ahead and drew another name and gave away some more stamps!  Woo hoo!!  So let's see who won!

Lawn Fawn Thankful Mice (x2)
Kristine Kubitz Fossmeyer & Cyndi Jarecki


Close to My Heart Paper Gardens
Annielovescardmaking


BONUS WINNER!!  Lawn Fawn So Jelly
Elizabeth Jean Pyper
 
 Congratulations to all the winners!  I have sent you each an email with instructions on how to claim your prize.  If I don't hear from you by the end of October I will draw a new winner. 


Thanks again, everyone and I'll see you soon with Day 2 of my Handmade Halloween video series!  Bye!

VIDEO: Copic Coloring Nerdy Love Birds featuring Lawn Fawn

Hi, all! Today I'm doing something kind of fun and recreating a card that I made when I first started stamping a year or so ago.  This card has been up in my Etsy shop even though the original has already sold and someone ordered a new one, giving me the unique opportunity to see how I could apply some of the new skills I've picked up to an old design.


I used the Say Cheese and Science of Love stamps sets from Lawn Fawn.  The nerdy-chic images in this set are near and dear to my heart since I am proud to be from a superbly nerdy family! Since I've done quite a bit more Copic coloring since I originally created this card I decided to try my hand at using Copics for the larger space of the Polaroid frame to get an ombre look.  I need more practice but it didn't turn out too shabby!  I was also able to apply some newly acquired masking skills to stamp the cute little love potion beakers inside the frame.


Overall, I think this card turned out even better the second time!  I really enjoyed taking the same design concept and making it fresh.  Thanks so much for joining me!  Don't forget to enter the 200 YouTube Subscriber GIVEAWAY!  Only three more days to enter and I'm now drawing FOUR winners to celebrate hitting 300 subscribers since the giveaway started!  See you all next time for Day 2 of my Handmade Halloween video series!  Bye!

[VIDEO COMING SOON!!]

~~~~~~~~~~~~~~~~~~~~~~~~~~~~~~~~~~~~~~~~~~~~~~~~~~~~~~~~
SUPPLIES
*Amazon affiliate links used when possible

VIDEO: Handmade Halloween: Day 1 ~ Batty Shaker Card featuring Simon Says Stamp

Hi there and welcome to Day 1 of my Halloween video series, Handmade Halloween!  For this series I will create five Halloween projects featuring all kinds of goodies from some of my favorite crafty companies so stay tuned for more!

To kick things off I wanted to use this absolutely purr-fect image from the Trick or Treat stamp set by Simon Says Stamp.  This set has been out for a while but it is new to me so I had a lot of fun coloring this image!  My favorite color combo for Halloween is purple and black.  I just love the way they look together so I created my own patterned paper using these colors and a spiderweb stencil by Carta Bella.  


To keep everything coordinated I used the Seedless Preserves Distress Ink (love the pink tones in this!) for my card base as well as the base of my patterned paper.  I finished it off with some Black Soot and Hickory Smoke Distress Inks for a super fun contrast.  Dracula Kitty is colored using Copic markers and I couldn't resist coloring him like my Egon kitty to add a splash of orange. 


This card has lots of die cutting, including the part that inspired me to do a Halloween shaker - these adorable bats that pop out when you use the Batty Border die by Memory Box.  They make the greatest shaker confetti!  And this scripty Halloween is so dainty and is the perfect pair for the kitty image.  I layered up three of those scripty sentiments to provide some stability to this super fragile die cut.


And that is the project for today!  Join me for Handmade Halloween: Day 2 (coming soon) as well as my 200 YouTube Subscriber GIVEAWAY that you can still enter until this Friday!  I am really close to 300 subscribers now and if I hit that mark before the end of the giveaway I'll draw a fourth winner!  The video tutorial is linked below as well as all of the supplies I used for this project.  Thanks so much for joining me!  Bye!


~~~~~~~~~~~~~~~~~~~~~~~~~~~~~~~~~~~~~~~~~~~~~~~~~~~~~
SUPPLIES
*Amazon affiliate links used when possible

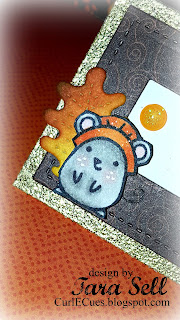
VIDEO + GIVEAWAY: Celebrating 200 YouTube Subscribers by Giving Thanks to You

 Good evening and happy Monday!  Tonight I am celebrating and I want to do that by giving away some of my favorite stamp sets to YOU!  Thanks to all of your support and encouragement I have reached a whopping 200 subscribers over at my YouTube channel!  Holy moly, you guys!  I am so honored and all I can say is THANK YOU THANK YOU THANK YOU!!

 
I decided to give away two of the adorable Thankful Mice stamp sets by Lawn Fawn - this company is absolutely in my top three favorite stamp companies - as well as the elegant and versatile Paper Gardens stamp set from Close to My Heart!  That means there will be THREE WINNERS and so many chances to enter using the Rafflecopter entry below!
a Rafflecopter giveaway   
 I used the Thankful Mice stamp set to create some cute little place cards for the Thanksgiving table.  This project was super easy and quick and demonstrates a great way to use this precious stamp set if you win it!  To see how these came together, check out the video below!  All the supplies are down there too, if you keep scrolling!


So again, thank you guys from the bottom of my ink-stained, glitter-covered heart!  I love sharing my passion and hearing from you all.  Thanks for stopping by!  Have a great evening!